Thursday, December 2, 2010

Moving Days

We are not moving like most folks move! It is bit by bit!  It is Dec 2010 and in Dec -- 9 entire years ago -- we were packing up to move out here to "camp" in a repo mobile home trailer until we could build our home....today Dec 1, 2010 we moved a little bit closer to that goal....the entire family (the ones left at home 6/11ths) and Carpenter and I worked all day.  We hung curtain rods, installed and set commodes and sinks, mopped the brand new tile floor that was finished yesterday, put in some furniture, hauled off construction trash and just had ourselves a grand time!


To top it all off ATT began working to get phone services up there...the technician said the line digger/installer was going "to love this job"!  It is up and down from the main road thru ruts and crags and woods and gulleys and hills -- he surely won't be bored! 

I am determined to spend my first nite up there before 2011 shows her face! I don't know if I'll be able to sleep from the excitement though!

Here is a peep at some of our movings -- the stone tile looks like it sort of melted off the pine walls and turned into stone! We are slowly getting used to it ;} Carpenter did such a good job and we are grateful to our friend, Zac, who allowed us to borrow his very nice tile cutter!

   
SAMUEL way up there scraping off manufacturer stickers from the windows.
Ezra's curtains partly done and hung...wheat twill panels to come.


These adorable silhouettes were scarfed up
from a thrift store by my sweet friend
who knew I would love them in my new house!
This is the hall-guest FACILITIES.

I've set up temporary sewing headquarters in a back bedroom
 to sew up all the draperys, coverlets, window shades and upholstered cushions.

Wish me happy moving....


Tuesday, October 26, 2010

Dancing Floors!

Back a VERY long time ago - Carpenter was offered anything he could salvage from Carolina School of Ballet - they were ready for demolition and a brand new dance school - so he and the crew of boys got to work and had to work fast before it went tumbling down.  He was able to retrieve 2200 sq ft + of red oak hardwood flooring that little feet had danced many hours on....poplar tongue-grooved boards that now grace our porch ceilings (I always think of feet dancing on the ceiling when I see it!)  and a lot of other goodies but these 2 were the biggest and best salvages!  We have moved and stacked, moved and stacked, moved and stacked these treasured piles many a time until now as they finally have their final home.
Here is a close look at the floor - aged, dirty and finally home.  It covers the entire upstairs and is perfectly aged and vintage - looking quite at home in its new home!
Carpenter rented an edger and spent one full day on his knees working the floor.  That was one aching back that night! He is such a hard worker - bless his heart!

We had decided to only take off the dirt and a bit of the old stains and leave a lot "on" for a authentic vintage look. Next full day was with a big sander but a lot easier since it was the walk-behind type. Next full day was Chelsey and I with small hand held sanders checking all the spots that may have been missed and touching up around the build in shelve and cupboards.  Then a full afternoon of cleaning and getting it dust free - the in house BEAM vacuum system made that a treat instead of a chore!  Here we have it to where we like it just fine. 
Another full day - I was the edger and brusher- Carpenter took charge of the long handled applicator.
Five gallons later we have it with a full top coat!
To finish up will be another day of renting a buffer-light sander and 3 more coats - 3 days in a row!
Then........
Our TO-DO LIST left upstairs will have suddenly after all these years been shortened to:
1- Build and hang the interior doors
2- Install door knobs and latches
3- Move IN!


I like 1-2-3 lists!

Big Lights take Big Budgets!

But you can make it yourself if you have a little budget! My beautiful custom-made first time we have ever tried to make a light - only ended up costing us $88 + $39 for chains + rachet and wire +  a circular cap + $9 for black flat spray paint!
You come in the front door to a wide open area that is open all the way up - 18 feet up!  We have the balcony around this area upstairs that has a walkway across from side to the other and a library (where I am already stashing books that have had no home - or should I say a proper home- for 7 years) - we aren't moved in yet, you know. 

So this area needed a really BIG light.  I had purchased all the lights and fans and bought a small black inexpensive metal light for the middle area - It was only 88$ - and when we came to the time to put it up - it was way to pueny and not right at all for the room.  So we put our heads together - and Carpenter took up lamp making.  We had a grand time all trying to help figure circumference and radius and working the plan for the new BIG light.

The 88$ light has been taken all apart into pieces.
We are having a hard time remembering where the iron ring came from - it seems we have been dragging it around and using it for this or that for a good many years now. Micah retrieved it from its current home in the herbgarden where it was a "Ring-Around-Martha-Washington Asparagus".  Ezra and Micah took the grinder to it and then cleaned it with muratic acid - Micah overcome with fumes from the nasty acid wryly commented "Let it be known to all, that I passed away making momma a chandilier!" It cleaned up nicely after their hard work and Carpenter got to work! [Micah is still alive and well too!]

Carpenter has this beautiful homemade light that graces the center of our home rigged so it can be lowered from the attic by racheting it down or up - makes for simple bulb changes, dusting and I can just envision this all decked in pine boughs in the bleak of winter! I was just about speechless when I saw it hanging and all finished for the first time - it was definitely MADE FOR this house and made WITH LOVE by Carpenter for his family.
How do you like it?

Monday, September 20, 2010

Siding - Pretty as a new outfit!

We have sided the house in hardwood (oak-red&white).  Most of the tall straight oaks were taken off the acres here as we had a large grove of them that was left here when we bought the cut over acres.  The previous owner had left 7 acres of hardwoods to make for better hunting grounds.  There were so many there you can hardly tell that they took out a bunch to make our siding.  It was completely "free" if you don't consider sweat, muscles, time and gas to run a chainsaw and the TimberKing for Carpenter and his crew of boys. For this task it was mostly Micah and oh the hours Carpenter and him spent getting the trees, sawing the boards into planks on the sawmill and planing and straightlining them into lap siding boards.  The job was completed in June 2010.

We recently priced a nice solid oak board at the local home lumber store like we put on the house - about 2000 of them wennt into our siding - and they were a mere $23 each!!!!!!!!!!!  So $23 x 2000 give or take a bit = $46,000 we could have put into siding!  With sawmill blades and gas I wager to say we have a bit less in it than that!

Doesn't it look like the house got a new dress!?  We put a semi transparent OLYMPIC stain on it - DESERT SAND which has a few pale grey streaks in it that goes well with the stonework we are doing on the house and looks as natural as possible as that suits Carpenter!

Undressed and waiting for siding:

We stained each board before they went up to keep stain spills and such off the shingled roof.
Micah, Luke, Samuel and Carpenter's Wife did this job. 


The first boards going up looked great!
Sam Asher still faithfully doing his job! Staining those boards!
The house is dressed and ready for the next thing on the list!

Wednesday, September 8, 2010

Loafing on the Job

The little boys were to be moving boards downstairs while Carpenter worked on the sander / edger on the hardwood floor - It was loud enough that it drowned out all the hanky panky that was going on while they were doing their assigned job!  I'm glad they can make a game out of work!  They got it all done and had fun too!

Tuesday, September 7, 2010

Kitchenette


Upstairs we have a studio for Marmee and a hobby room for Carpenter and a library
and a full bedroom/full bath/walk in closet and a large open area we will use as a game/play room.
We decided to put a little kitchenette in up here so we can easily make snacks, pop popcorn and make milkshakes.  We put in a little sink and cabinets (no doors on yet) and will put in a microwave, mini fridge and ice machine.  A few bar stools around the counter and I think we will use this area a lot!
Today Carpenter went to rent a edger/sander and is sanding the hardwood floor upstairs.
The floor is red oak from a ballet studio.  We got every piece for free excluding the sweat and time it took for Carpenter and boys to extract it from the dance school that was to undergo demolition and make room for a new one to be built.  We had a plenty to cover the entire floor area upstairs - nearly 2000 sq feet.
After it has been sanded (we are doing minimal sanding to retain the distressed/rustic look) and has a good coating of sealer - it should be beautiful!  That flooring has been hauled around with us from the previous Greene Acres to here with tarps over it - to the barn once it was built - to the upstairs - and is finally in its final resting place.  If "touch = love" that floor has a lot of love in it!

Free Iron Spindles!

We knew we wanted a wrought iron railing around our open area upstairs
and up the stairway but realized at approx. $4.29 per spindle and we only needed
about 300 of them??? eeks! - we are doing this project debt-free and that
wouldn't be feasible! Way too expensive!  So here is what we ended up with...
how do you like it?  We LOVE it!  Carpenter scavenged (with permission) at every
construction site he could find over a period of months and came home with assorted
lengths of rebar - (like is used to reinforce concrete) - one of the boys cleaned it all up on a
grinder and then painted each one flat black. I even spent an afternoon painting them.  The spindles are as sturdy as can be and look just beautiful in our rustic country home. The best part about it - it was free except for the bit of paint and time spent to gather/scavenge for them.
A small bloop with Carpenter drilling the holes where each spindle fits into the beams - he measured the distance wrong and ended up with a large drilled hole in the wrong place.  I LOVE the mistake!
He put in an extra spindle in its place and used the welder and made a shepherd's hook on the end of it.
I found a little LED candle lantern and it is our little nite watch lantern.  The Lantern has a timer and comes on for 5 hours each evening at dark and turns off on its own.  It flickers with just a tiny light.

"Nothing ventured - Nothing Goofed!"
or is that "nothing gained"?  Oh well - our goof was our gain! We have a really nice lantern on our stairway!
If you are interested in getting a lantern like ours - it was purchased at http://www.save-on-crafts.com/

Saturday, September 4, 2010

The Facilities

The new house has 4 bathrooms.  We currently are blessed to have 2 in our tiny space.  One bathroom is just NOT enough for a big family and we have "made do" just fine with 2 - at least one is usuable if the other is occupied. I am just thankful for indoor plumbing!  But 4 is going to be luxury as the Master and 2 of large bedrooms have their own private full bathrooms.  The 4th is off the long hallway and will service the other 2 boy bedrooms. I originally intended for it to be a 'guest' facility too - but I am not sure that is going to be such a good idea since it will be used mostly by the 3 younger boys! 

The Master bedroom has an adjoining dressing room with sink and then off that adjoins to small rooms - one accomodates the shower and the other the "facility".   This is the first room I started "playing house" in - way before it was time to do things like this - but I had to get it out of my system and get a feel for the decor I was going to use in this house full of wood. The Facilities room is all cedar from our acres - walls &ceiling.
Carpenter cutom built me this shelf over where the commode will sit. 
 I had the boys install this wrought iron toilet paper hanger  I bought from SticksNStitches.


The tin ROSES sign is from allposters.com and I have recently added a FACILITIES sign I made from scraps of cedar we had laying around (little boy was sweet enough to cut it out for me to my desired shape)  I've painted it with a base coat of green and rubbed over it with some black and creamy paint and then rubbed most of it off with a damp cloth to make it look distressed and then added the
 lettering from none other than the Fruitful Vine Lady. 
I've been collecting little glass bottles for a long while now and this is part of my collection.

This nest adorns one of the cubbies in the cedar shelf.  My little boy found me the nest on our acres
and I wove the nest "a lining" from copper wire we had left over from the wiring.  The eggs were found for me by a sweet son who knew I was looking to fill my nest.

Every bathroom should smell sweet - My jar of dried twigs and paper roses is filled with
homemade potpourri and I freshen it up every now and then with a few more drops of essential oil.


The FINISH LIST for the Master Facilites Room is getting shorter! We have 1-2-3 and one room is completely done! I pay not attention that this is the smallest room in the house - so the list can't be that long! I already have TP in there - I am ready to move in!


1-Install floor
2-Install commode
3-Install baseboard trimwork

Wall Art

I am just in love with the idea of writing on my walls!  I had done a Scripture above the arch on my dining room in our other house and it was my first time to write on my walls and it hooked me!  I did it the hard way:
I printed my verse on regular copy paper (a few words on each page in a very LARGE sized FONT) and taped together my lengths of paper to make a 44” long banner. Then I used the old-fashioned type carbon paper that was used to make duplicates in old-fashioned typewriters. I taped with painter tape the carbon paper then my verse banner I had printed out on top of that. All taped and centered, I used a soft blunt pencil and traced the outline of the letters onto the wall. Then after removing the pattern and carbon (tracing paper) I used a thick black permanent marker and colored in the letters. I can say I used a LOT (many more than just ONE) of black permanent markers to complete the verse I lettered over our dining room archway, but I felt much more in control of the artwork using the marker than a brush and paint.
For the new house - we only have plank wood walls with a KlearKote on them.  Carpenter is very un-fond of paint!  I will have to say the raw wood is very interesting with every piece having different knot formations and streaks and colors.  I am having fun trying to get my decor all wrapped up into this "raw wood" look. 
Trying not to be obsessed with the wall art - sheeesh! - I like it so much I keep thinking of ideas where I can put it next!  Too much of a good thing is too much! I have found the EASY way this time around - The Fruitful Vine Lady - this beautiful easy to install lettering can be custom made for just for you!   So I splurged for my birthday and made it big.  It graces our BIG main room in the house - and can be seen from the front entry and is placed up over the sliding doors that go out the back way.
The Scripture is from Psalm 147:13-14 - This picture (lighting was funny - below pictures is much truer to what our walls look like)  is before the ceiling was installed - I get so antsy to give the house "my touch" I always get the "cart before the horse" - Carpenter says "This house could use a woman's touch" - and I smile and get warm fuzzies inside.  I love making a house a home. The ceiling and lights have been installed since - isn't it beautiful?
I've also used Fruitful Vines lettering - and put it on a few signs for the bathrooms and on glass apothecary jars in my bathroom.  Hopefully some pictures later of where I am sneaking in these letters I love!
Yes! It goes on anything - wood, glass,porcelain, mirrors and more!  Now you know why I have to restrain myself and not put it on everything!  It also has the great advantage of coming off with no damage to the surface - why would I want to remove it though?!?  But that was a good selling point as Carpenter did not want the wood tarnished if we needed to take it down.  There is a lot of work inside those wooden walls! 

“Therefore ye shall lay up these my words in your heart and in your soul, . . .and ye shall teach them your children, speaking of them when thou sittest in thine house, and when thou walkest by the way, when thou
liest down, and when thou risest up. And thou shalt write them upon the door posts of thine house, and upon thy gates.”  Deuteronomy 11:18a,19,20

Thursday, August 26, 2010

The TIMBERKING


The quality of this little homemade video clip is not so good and what happened to the sound is a mystery - but that is okay - it is super loud and not sweet music anyway-you probably don't want to hear it - but you can see our TIMBERKING in action here - we have saved literally 1000's and 1000's of $$ by making this investment. Our boys have built muscles bigger than most boys can get in any gym and never had to pay for a membership! We have sons in the tree service business in fact 2 sons and a son-in-law - all in tree service - so we never were at a lack for logs to saw into lumber.  We haven't paid for a single log yet - if you don't count sweat, time, muscles and gas for transporting them as $$. Carpenter says it is the very best decision we have made yet - to buy our own - since this home would be "built from scratch"!

Walls Going Up!

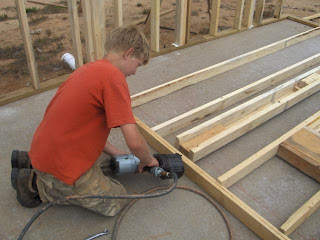
This was one of our very most exciting days!  The first walls up. So much preparation had to go into making this day possible.  The foundation is a cement slab and Carpenter had poured and set the footers along with the slab in late in 2001 before we ever moved out here - soon after we made the purchase of the acres.  It sat for over 5 years before we were ready for the walls to sit on its sturdy base. We had to acquire the wood!

We're at the front door of HomeSweetHome

This has been CARPENTRY 101 for all our boys. Wow have they learned a lot and
become skillful carpenters beyond their years!

All winter before these walls went up in the Spring of 2007 Carpenter had been inside our big barn (he built that too - another post - another day) putting together window and door headers.  You can see them all over the area here - this made putting up the basic wall structure go lightening fast.

This was April 20, 2007

Just over a week later
By June 24, 2007 they had accomplished to this point - just my Carpenter and his boys!

Real Life as It Is

This is the bare truth of it -- we have been living on the front part of the wild acres since we purchased it. We knew we couldn't be far away if we were to work on this place and build a home.  The Lord provided us a mobile home (we purchased it at a bank repot auction) that was very liveable - not large - liveable with just a little fixing up and here we have been what Carpenter's Wife calls "camping" since we purchased the acres.  I am thankful for the little patches of weeds that have covered up SOME of the red mud - it was a hard pill to swallow to call this my front yard before the weeds came up - actually it was a very muddy mess that didn't always stay outside where it belonged.

I tend to laugh at myself now wondering how on earth I got it into my dreamin' head that we would sign the papers and buy this big piece of wild and wooly acres and then suddenly (what was I thinking!) about...hmm...a year later??..... move into the big dream house we had planned to build.  What  lessons that have needed to be learned in contentment, patience, and waiting, waiting, waiting...still learning.....daily! (Carpenter's Wife calls it God's Grade School - if I could ever graduate I might get a new lesson to work on!)

Whatcha Buildin' ?

Our house which has been in progress for nearly 7 years is being built totally from scratch and salvaged materials as a labor of love for his family by my very own Carpenter. The first house was "The House that Roger Built" as a wedding gift for his bride. This one is being built by the whole family with Carpenter as chief engineer-architecht-jackofalltrades-foreman and a.k.a. Poppee, Carpenter's Wife as cook-sawdust sweeper-decorator-finishing touch gal a.k.a as Marmee and our crew of helpful and sweet children as helpers. We are using a TIMBERKING Sawmill to mill the lumber for much of the house. NO paint, NO carpet - LOTS of wood! Carpenter loves this. I'm growing to love it too. This blog will be a look at the process, the progress, and how we did it - ehem...are doing it. We are in a never ending process it seams. But that is life - a journey - not a destination! No promises that anything will be in a steady timeline (We are years into this already!) but bit by bit the blog will fill with the process of building from scratch - where we've been and where we are today - Home is where the heart is!